Thursday, April 12, 2012

Install Native Ubuntu 11.10 on EeePad Transformer TF101 with Linux

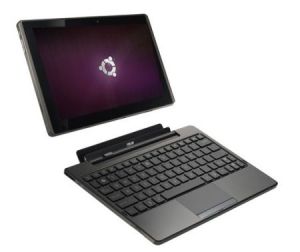
Ubuntu Transformer
After I installed Ubuntu 11.04 on a EeePad Transformer TF101 B60, I found several problems:
  • Its rootfs is too small (2.9G) and resizefs did not work
  • Slow response since Ubuntu runs on an external sdcard
  • Touch pad of the Transformer keyboard dock did not work
  • Wifi problems
So I wanted to try the Linux version in forum.xda-developers.com/wiki again. Here was what I did:
  1. Download the OLiFE Prime Edition and extract it on a Linux machine;
  2. From the extracted directory run OLiFE.sh;
  3. Choose the flash device option;
  4. Choose Dualboot; other Linux boot options does not work for me;
  5. Choose Android as the default; For the moment Ubuntu as default doesn't seem to work since I run into booting loop problem. To boot the other system, hold the Volume-down button when you turn the device on until asked to press the volume up button;
  6. Put the device in APX mode. To do that first shut it down then restart it and when the eee pad screen appears hold down both the Volume-up button and the Power button for 5-6 seconds. The screen will go black and stay black, and briefly pressing the Power button has no effect. Then connect it to the computer via the USB cable. If the device refuses to shutdown properly or is already in APX mode but isn't recognised, hold the Power button for 10s until the eee pad screen appears and then try, try, try again;
  7. Finally you will see some messages saying that the various partitions are being copied across. This takes a good long while.
  8. Power off and on. Android Prime is up. Push the power button, an option menu (Restart, Shut Down and Recovery) will come up. Pick "Recovery";
  9. The machine magically boots into Ubuntu! Then I saw a hang in resizefs;
  10. After few hours I decided to force power off and restart the device;
  11. Finally I got a good working Ubuntu 11.10 machine with all above problems gone with the Windows installation. 

Wireless Platforms Market Will Grow to $155.2 Billion by Year 2016

Research and Markets said the global wireless platform market stood at $61.5 billion in year 2011 and is expected to reach $155.2 billion by year 2016, at 20.3% CAGR during the projected period, according to "Wireless Platforms Market – Global Forecasts & Analysis (2011 – 2016)". 

Wednesday, April 11, 2012

Install Native Ubuntu on EeePad Transformer TF101 with Windows

Thanks to eeepadhacks.net for providing a tool to install native Ubuntu 11.04 on  EeePad Transformer TF101.

Since I did not install successfully with Linux method (I got keeping boot loop as many people complained), here I only described what I did with a Windows installation. My device model is B60.
  1. Download EeePad Transformer Ubuntu Package and unzip it;
  2. Download custom ROM 3.1 Build 8.4.4.5 nvflash_windows.zip and unzip it; The Android 3.2 did not work for me;
  3. Put your Transformer into APX mode by turning your tablet off, then powering it on WHILE HOLDING DOWN the Volume Up button for about 3 seconds;
  4. Make sure you have APX drivers installed, if not, watch my video to install it, the drivers are located in usbpcdriver directory in tfubuntu folder.
  5. In the custom ROM directory unzipped by nvflash_windows.zip, run download.bat. After the flashing down, it will boot to Android 3.1;
  6. Prepare a microSD card for your Transformer bigger than 2GB and copy the whole “Ubuntu” folder of the EeePad Transformer Ubuntu Package the into the root directory of your microSD card on the Transformer.
  7. Turn off device and put your Transformer into APX mode again, go to the directory of  tfubuntu and run "flashbat";
  8.  After flashing, hold down the Power button to reset your Transformer, you should now boot into Ubuntu;
  9. Follow "HOWTO: Wireless Security - WPA1, WPA2, LEAP, etc." to setup WIFI.

Tuesday, April 10, 2012

One-click Root for Asus Transformer TF101 C10 on Android 4.0.3 (ICS 9.2.1.17 Firmware)


Since Asus may lock the bootloader after B60, the NVFlash method may not work anymore for newly purchased TF101 devices, such as C10. Thanks to XDA-Developers member -viperboy-, viperMOD Prime Time v4.5 has been updated to work on the latest Android 4.0.3 (Ice Cream Sandwich) - 9.2.1.17 firmware. After update your firmware from Android 3.2.1 to the latest 9.2.1.17, the tool is very simple to use and is one-click rooting tool. 

(1) Requirements:

  • Download tools from Windows or Linux.
  • Make sure that USB Debugging is enabled on the tablet. This is possible by going to Settings > Developer Options
  • Make sure tablet is at least 70% charged

(2) Windows Procedures

  • Unzip the contents to a new folder
  • Kill Splashtop and Asus Sync and connect the tablet to the PC via the USB cable
  • Install all the drivers located in the new folder including the adb driver
  • Run PrimeTime.exe for windows users. A command prompt line will show up

(3) Linux Procedures 

  • Unzip the contents to a new folder
  • chmod a+x for all files
  • run the script primetime.sh under the root user

Type 1 to begin the rooting process.

Once done, install OTA ROOT KEEPER from Android App market.

With the help of OTA Root Keeper, you’ll have a backup of your device’s root and will allow your root to survive OTAs.

Sunday, April 8, 2012

HM-6.1 Compatible x265 Released

A simple HEVC or H.265 implementation - x265 developed by a x264 pioneer Min Chen was released. It can be downloaded at the x265 project website. It is compatible with the latest HEVC reference software HM-6.1. I believe it is a good reference code for HEVC or H.265 beginners to learn or start a H.265 project.

Thursday, April 5, 2012

ARCHOS 101 G9 Turbo ICS 4.0.5 Rooting

Recently the upgrade to the firmware 4.0.5 (Android 4.0.3) from Android 3.2, which brought along many welcomed improvements and changes, was released by Archos. At least I haven't seen annoying blinking of the right down corner section when connecting to a host machine to tell USB charging status?

In Settings -> About tablet -> System updates, you may upgrade your tablet to this version automatically online or download the firmware 4.0.5 and use the recovery mode to install this firmware by "Update Firmware".  However your previous root may not work. Thanks to surdu_petru from xda-developers.com who developed a tool for new rooting.

After the tablet is SDE enabled, the procedures are:
  1. Download ICS_405.zip and drive_405.zip and unzip;
  2. Connect the tablet to your host machine and start adb by "adb devices";
  3. Copy archos.ext4.update into Internal Storage by "adb push archos.ext4.update /data/media";
  4. Power off your device;
  5. Boot into recovery by holding the volume rocker down and pressing the power button simultaneously you should now be in Recovery mode and select "Developer Edition Menu";
  6. Remove Android Kernel" (if the option is present, if not, skip);
  7. Select Flash Kernel and Initramfs;
  8. Copy zImage and initramfs.cpio.lzo to the drive that appears;
  9. Reboot your device. Your device should now be rooted.
According to the author, this root version works on all tablets generation 9 and is stable and can be used as a daily ROM!

If the tablet is not booting for some reason, you still can use the recovery mode to reinstall the firmware 4.0.5 by "Update Firmware" again. 
Enable SDE for ARCHOS 101 G9 Turbo

Archos provided Special Developer Edition (SDE) firmwares that consists of a proof-of-concept software intended for experienced software developers only for G6/G7/G8 tablet. With SDE a dual boot system is possible for Archos tablets.

Thanks to letama from xda-developers.com who developed a tool to enable SDE for G9 tablet. After applying root for ARCHOS 101 G9 Turbo, The procedure to enable SDE is:
  1. Download gen9_enable_sde.zip (3.2 MB) and save it to your Windows or Linux PC;
  2. Extract the contents of gen9_enable_sde.zip into a folder on your computer;
  3. After adb startup, inside the folder where you extracted the contents of gen9_enable_sde.zip to, look for enable_sde.bat or enable_sde.sh and double-click the file;
  4. At the command prompt, enter the following command to remove Paul's root, which messes sound and device sleep, with " adb shell rm /data/local.prop ";
  5. Reboot into recovery mode by holding down the “Power” and “Volume Down” button, you should have the SDE menu now

Wednesday, April 4, 2012

Android NDK C++ Exceptions and RTTI Link Errors

When using Android NDK to build performance-critical portions of Android apps in native C++ code, we may get C++ link errors such as:
  • undefined reference to `__cxa_end_cleanup'; 
  • undefined reference to `__gxx_personality_v0'; 
  • undefined reference to `vtable for __cxxabiv1::__si_class_type_info'; 
  • undefined reference to `vtable for __cxxabiv1::__class_type_info'.
The first two errors are caused by no exceptions support in Android NDK toolchain, and the last two errors are caused by no RTTI support in the toolchain, according to the latest Android NDK release note STANDALONE-TOOLCHAIN.html under the docs directory. The documentation also mentioned any C++ STL (either STLport or the GNU libstdc++) with it are also not supported.

To get around the above linking errors, add compile flags 
  • -fno-exceptions to disable exceptions
  • -fno-rtti to turn off RTTI

Followers

Blog Archive

About Me

My photo
HD Multimedia Technology player