- Install the latest version of Samsung Kies.
- Download the p6210_CWMR_20120107.zip to your PC.
- Prepare a MicroSD Card for your tablet’s external SD card.
- Connect your tablet to your PC. Copy the zip file to the external SD card.
- Power off your tablet.
- Reboot the device into recovery mode by holding the Volume Up button along with the Power button.
- In recovery mode, select the option to install update from external storage.
- Locate the zip file in your external storage. Select the file by pressing the Power button.
- When the rooting process finishes, reboot your device.
- In Android Market or Google Play Store and search for the SuperUser app, BusyBox, and Root Checker Basic.
- Install the apps and run SuperUser and Root Checker Basic.
- Root Checker Basic's "Verify Root Access" will report "This device has root access!"
- Reboot to the device into recovery mode and you will see the ClockworkMod menu.
Thursday, March 22, 2012
Samsung Galaxy Tab 7.0 Plus GT-P6210 ClockworkMod Recovery and Root
I tried the method developed by garyd9 at xda-developers and it works for my GT-P6210:

Wednesday, March 21, 2012
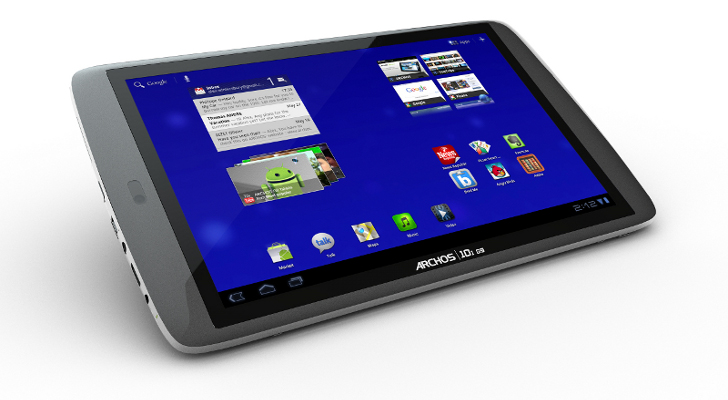
ARCHOS 101 G9 Turbo and Rooting
How to root?
PaulOBrien developed a rooting tool for Archos 80 G9 and I tried this tool for ARCHOS 101 G9 Turbo. It also works. The procedure is the same as the original one:
- Ensure you can see your device in ADB - do 'adb devices' (or 'adb-windows devices' / 'adb-linux devices' / 'adb-mac devices' as appropriate). If you do not and you are using Windows, check device manager to ensure that you have any required drivers installed. If you still can't see your device or are not using Windows, edit adb_usb.ini (which can be found at 'C:\Users\%USERPROFILE%\.android\adb_usb.ini' on Windows and '~/.android/adb_usb.ini' on Mac / Linux) and add the line ' 0x0e79' before restarting adb ('adb kill-server').
- Download 'Step 1' of the root process - DOWNLOAD - MD5: 6645915d4f252888a9dc0303519b15a6
- Download 'Step 2' of the root process - DOWNLOAD - MD5: dc16d0c53bc420be4b898481e31fdc2a
- With the 2 files in your current directory and your device connected issue the following commands (waiting for the device to reboot after the reboot commands):
adb push 1 /data/local/
adb push 2 /data/local/
adb shell chmod 0755 /data/local/1
adb shell chmod 0755 /data/local/2
adb shell /data/local/1
adb reboot
adb shell /data/local/2
adb reboot
- And that's it! Now when you connect via adb shell you should see the '#' prompt which means you have a root shell.
Samsung Galaxy Tab 7.0 Plus GT-P6210 and Rooting

Samsung Galaxy Tab 7.0 Plus has
- Android 3.2 Honeycomb with TouchWiz on top
- 7″ IPS LCD display of 1024×600 resolution
- 1.2 GHz Dual core Exynos Processor, 1 GB RAM
- 3 MP rear camera with LED Flash, can do HD (720p) recording, 2 MP camera on the front
This tablet runs on the same Exynos chipset as the Galaxy S II (excluding the T-Mobile version), and it adds in all the hardware-acceleration-enhanced goodness of Honeycomb - turbocharging Samsung's already blisteringly fast dual-core processor. Samsung announced Exynos 5-series with a quad-core GPU in last November.
- Install the latest version of Samsung Kies.
- Download the rooting file root.zip to your PC.
- Prepare a MicroSD Card for your tablet’s external SD card.
- Connect your tablet to your PC. Copy the root.zip file to the external SD card.
- Power off your tablet.
- Reboot the device into recovery mode by holding the Volume Up button along with the Power button.
- In recovery mode, select the option to install update from external storage.
- Locate the root.zip file in your external storage. Select the file by pressing the Power button.
- When the rooting process finishes, reboot your device.
- In Android Market or Google Play Store and search for the SuperUser app, BusyBox, and Root Checker Basic.
- Install the apps and run SuperUser and Root Checker Basic.
- Root Checker Basic's "Verify Root Access" will report "This device has root access!"
Tuesday, March 13, 2012
One-click Recovery + Root for Le Pan II on Android 3.2.1

Thanks to dbaybay for providing detail instructions and tools to root Le Pan II TC-979 which has Qualcomm APQ8060 (1.2GHz). The procedures include two steps:
Install ADB Package for the Le Pan II, Windows Users
- Install JDK 7 if it is not installed in your machine
- Download the JDK
- Install the JDK
- Download "lepanlife" and unzip the folder "lepanlife"
- Place the ".android" folder in your "home" folder (If you click start and then on your username in Windows 7 or Vista, or "C:\Documents and Settings\your username" in Windows XP, this is where it goes. In the root folder where desktop, downloads, my pictures, etc.. is.)
- Once you've taken the ".android" folder out, place the whole, unzipped "lepanlife" folder in the root on your c:\ drive. So it should look like: c:\lepanlife
- Start your Le Pan II and turn on USB Debugging (Settings > Applications > Development Options > USB Debugging)
- In android_winusb.inf under c:\lepanlife\drivers, if
%CompositeAdbInterface% = USB_Install, USB\VID_16d5&PID_8006&MI_01
should be changed to
%CompositeAdbInterface% = USB_Install, USB\VID_16d5&PID_8005&MI_01
- that change from PID_8006 to PID_8005 under CompositeAdbInterface.
- Open your device manager of Windows and plug in the USB cable of Le Pan II to the Windows machine
- Right click on "ANYDATA HSUSB DEVICE" and click update drivers. Choose the "Let me choose drivers" option and then click the "have disk" option. Navigate to the "c:\lepanlife\drivers" and click on the "android_winusb" file and then click ok. Install the driver and restart your computer
- When your computer restarts, open a new command prompt and type in: cd c:\lepanlife\adb
- And then type in: adb devices
- You should see several numbers under Devices Connected. This is the serial number to your device and you're all set to start us ADB!
- Download the Dbaybay's One-Click Root Package and extract contents.
- Run Part-One.bat (this will reboot your tab to fastboot, flash CWM, reboot normally & then reboot you to recovery)
- Once the above is done and you are in CWM, close the Part-One.bat Command Prompt!
- Run Part-Two.bat (this will install Superuser.apk, su binaries & busybox binaries)
I tested with the HTK75.users.v114 build with a Windows XP host machine and obtained a rooted Le Pan II.
Monday, March 12, 2012
Viewsonic G Tablet Android ICS Rooting
Thanks to the excellent work from Team DRH (Dirty Reset Hole), Android ICS (Ice Cream Sandwich) works for Viewsonic G Tablet. It is a huge jump for the G-Tablet community because along with the building of ICS specifically for SMBA1002 (G-Tablet), the Linux kernel backbone had to be reworked from the ground up.

 These directions are David Jackson’s, and they worked fine for me when I flashed ICS.
Install ClockWorkMod
Clear Data
Install ClockWorkMod
- Download the CWM file (CWM5504.1.2internal.zip) and save it on your PC.
- Unzip the file. Inside the archive, you should find a FOLDER called recovery, and a FILE called update.zip.
- Use your USB cable to connect your G-Tablet to your computer.
- After it connects you should get a popup that asks what you want to do with the device – click open to view files.
- Drag the recovery folder and the update.zip file to the root of the INTERNAL SDCard, (the folder that you just opened).
- Turn off your G-Tablet.
- Get into recovery mode by pressing the power and volume “+” button at the same time. When you see the words “recovery key detected”, you can let go of the buttons.
- Let CWM install, and if you see “Installing package” and it stays like that, leave it for a while and then press “reboot system” and it should work fine.
- Walla – you now have ClockWorkMod 5.5.0.4 on your G-Tablet, and you can always access it by holding the power and volume “+” buttons during power on.
Clear Data
- On the Main CWM Menu, select ”Wipe data/factory reset” & press home to execute
- Select “Yes — delete all user data”
- Select “Wipe cache partition“
- Select “Yes – Wipe Cache”
- Select “advanced” and then “Partition SD Card” & execute (Answer 2048 to the first and 0 to the second option.)
- Wait until it is finished – this step takes a couple minutes. Press the back key to return to the main CWM menu
- Connect the USB cable between the GTab and your computer
- Select “mount USB storage”
- Download the ROM file (TeamDRH-ICS-Preview-2B.zip) and the GApps file (3DGtaB_GAppZ_v7B.zip) (Updated 03/01/12)
- On your computer, find the ROM file that you downloaded
- Copy the ROM file and the GApps file (both still in ZIP format) to the root of the internal memory (14gig) of the GTab.
- In ClockworkMod, select “Unmount USB storage” & execute
- Remove the USB cable from the GTab.
- Press the back key to return to the main CWM menu
- Select “install zip from sdcard” & execute.
- Select “choose zip from sdcard” and press home.
- Use the volume controls to locate & select the ROM zipped file (TeamDRH-ICS-Preview-2B.zip) that you copied to the root, and install it.
- Select “Yes”
- When the GTab finishes with the installation, it will report “Install from sdcard complete.”
- Press the back key to return to the main CWM menu
- Select “install zip from sdcard” & execute.
- Select “choose zip from sdcard” and press home.
- Use the volume controls to locate & select the GAPPS zip file (3DGtaB_GAppZ_v7B.zip) that you copied to the root & install it.
- Select “Yes”
- When the GTab finishes with the installation, it will report “Install from sdcard complete.”
Unfortunately Google Apps do not work very well for me. Lots of crashes occurred including new Google Play Store.
Sunday, March 11, 2012
Xilinx Zynq ARM/FPGA SoC
Xilinx Zynq is a big FPGA with a dual-core ARM Cortex-A9 with a big FPGA around it, as a programmable system-on-chip; an alternative to an ASIC or SoC that doesn’t require exotic EDA tools and hyper-expensive production. It contains:

Among Zynq-7000 EPP devices, Z-7010 and Z-7020 are based on the Artix™-7 FPGA fabric, and Z-7030 and Z-7045 are based on the Kintex™-7 FPGA fabric.
For as little as $15, it could take the place of a custom-designed SoC, but without the million-dollar development effort.
Xilinx is seeing an addressable market for Zynq of more than $12.7 billion by 2014, according to Larry Getman, vice president of marketing for processing platforms at Xilinx, including intelligent video.
- Dual ARM Cortex™-A9 MPCore
- Up to 800MHz
- Enhanced with NEON Extension and Single & Double Precision Floating point unit
- 32kB Instruction & 32kB Data L1 Cache
- Unified 512kB L2 Cache
- 256kB on-chip Memory
- DDR3, DDR2 and LPDDR2 Dynamic Memory Controller
- 2x QSPI, NAND Flash and NOR Flash Memory Controller
- 2x USB2.0 (OTG), 2x GbE, 2x CAN2,0B 2x SD/SDIO, 2x UART, 2x SPI, 2x I2C, 4x 32b GPIO
- AES & SHA 256b encryption engine for secure boot and secure configuration
- Dual 12bit 1Msps Analog-to-Digital converter
- Up to 17 Differential Inputs
- Advanced Low Power 28nm Programmable Logic:
- 28k to 350k Logic Cells (approximately 430k to 5.2M of equivalent ASIC Gates)
- 240KB to 2180KB of Extensible Block RAM
- 80 to 900 18x25 DSP Slices (58 to 1080 GMACS peak DSP performance)
- PCI Express® Gen2x8 (in largest devices)
- 154 to 404 User IOs (Multiplexed + SelectIO™)
- 4 to 16 12.5Gbps Transceivers (in largest devices)
Among Zynq-7000 EPP devices, Z-7010 and Z-7020 are based on the Artix™-7 FPGA fabric, and Z-7030 and Z-7045 are based on the Kintex™-7 FPGA fabric.
For as little as $15, it could take the place of a custom-designed SoC, but without the million-dollar development effort.
Xilinx is seeing an addressable market for Zynq of more than $12.7 billion by 2014, according to Larry Getman, vice president of marketing for processing platforms at Xilinx, including intelligent video.
Key Documents
Friday, March 9, 2012
ZiiLABS ZMS-40 for Android Tablets to Support HEVC/H.265

ZiiLABS ZMS-40 has Quad 1.5 GHz ARM Cortex-A9 MP Cores and 96x fully-programmable StemCell Media Processing cores, and supports wide range of accelerated video codecs including H.264, VC1, WebM (VP8) and HEVC, including ultra-high-resolution H.264 HP decoding of up to 3840×1080 for true 1080p 3D stereo, a rich and interactive desktop browsing experience, 2560×1600 (WQXGA) display resolution support, higher-quality video encoding and immersive OpenGL ES graphics and future support for High Efficiency Video Coding (HEVC).
The up-and-coming HEVC standard (also known as H.265), besides other qualitative benefits, can also increase data compression ratio by up to 2X as compared to H.264. These technology wizardries are achieved by requiring many more times the computational complexity. HEVC claims to target the next generation Hi-Def TV market which can support scalable resolutions from 320×240 to 1080p with improved picture quality in terms of noise level, color and dynamic range, and all the way up to an incredible resolution of 7680×4320. Being fully programmable and with their massive parallelism, the 96 cores of StemCell Media processors can easily handle the onerous computational requirements of this new CODEC and support higher resolutions that are beyond today’s display systems.

- ZiiPhoto for intelligent photo browsing, 3D slide show and special photo effects,
- ZiiCamera for real-time preview and capturing of photos with 3D effects; live ultra high resolution 40 megapixel Panoramic photo capture in one sweep; and high dynamic range images,
- ZiiVideo for advanced video playback including 1080p WebM (VP8) support and trick modes (such as reverse play, frame-by-frame advance and reverse, multi-speed play and more), and skip to any part of a movie by browsing a timeline with thumbnails,
- Creative Sound Blaster X-Fi’s Crystalizer and CMSS-3D audio effects.
The ZiiLABS ZMS-40 is sampling to select customers based on the JAGUAR tablets running Android 4.0 (Ice Cream Sandwich).
Subscribe to:
Posts (Atom)
